I honestly believed that warm, fluffy, truly golden homemade biscuits could only come from a restaurant kitchen or a grandmother’s secret recipe box. For most of my life, my family’s version came from that pressurized can that popped open with a startling bang, a sound that was both exciting and a little bit scary. They were fine, a perfectly acceptable vehicle for butter and jam, but they never had that soul-warming, melt-in-your-mouth quality I craved. It wasn’t until I was well into my thirties, armed with a little curiosity and a desperate need for real comfort food, that I discovered the truth: incredible, flaky, buttery biscuits are not just possible at home, they’re surprisingly simple.
This isn’t one of those complicated recipes that requires special equipment or techniques passed down through generations. This is the recipe that proved to me that anyone can make phenomenal biscuits. The magic is in the method, not the madness. It’s about understanding how a few basic ingredients—flour, butter, and baking powder—work together to create those irresistible, flaky layers. The first time I pulled a batch of these from my own oven, the aroma of toasted butter and warm bread filled my kitchen, and I knew I’d never go back to the can. This recipe is more than just a set of instructions; it’s a gateway to creating your own comforting moments and delicious memories, one perfect biscuit at a time.
Ingredients for Golden Homemade Biscuits
The beauty of a classic biscuit recipe lies in its simplicity. You don’t need a long list of fancy ingredients to achieve perfection. In fact, the quality of these golden homemade biscuits comes from using a few pantry staples correctly. The key is in the temperature and the quality of your main components. Cold butter is non-negotiable; it’s the secret to creating steam pockets in the oven that result in those coveted flaky layers. Using an aluminum-free baking powder is a small detail that makes a big difference, preventing any metallic aftertaste and allowing the sweet, creamy flavor of the butter and flour to shine through. Think of this list as your toolkit for comfort.
- 2 cups all-purpose flour
- 1 1/2 tbsp aluminum-free baking powder
- 1 tsp white sugar
- 3/4 tsp fine sea salt
- 1/2 cup cold unsalted butter, cut into small cubes
- 1 cup minus 2 tbsp half-and-half (or whole milk)
- 1/2 tbsp melted unsalted butter, for brushing
How to Make Fluffy Homemade Biscuits
Following these steps carefully will lead you to the best homemade biscuits you’ve ever had. The process is straightforward, but the most important advice I can give is to be gentle. Your goal is to keep the butter as cold as possible and to avoid overworking the dough. Over-mixing develops gluten, which results in tough, dense biscuits instead of light, fluffy ones. Read through the instructions once before you begin, gather your ingredients, and preheat your oven. When you’re ready, work with a light touch and trust the process. Your reward will be a pan of perfectly risen, golden-brown biscuits that are tender on the inside and slightly crisp on the outside. This is the fundamental technique behind any great biscuit recipe.
- Prep Your Oven and Pan: Preheat your oven to 425°F (220°C). Line a baking sheet with parchment paper to prevent sticking and ensure an even bake.
- Combine Dry Ingredients: In a large mixing bowl, whisk together the all-purpose flour, baking powder, sugar, and fine sea salt. Whisking helps to evenly distribute the leavening agent, which is crucial for a good rise.
- Cut in the Cold Butter: Add the cold, cubed butter to the flour mixture. Using a pastry blender or your fingertips, quickly cut the butter into the flour until the mixture resembles coarse crumbs with some pea-sized pieces of butter still visible. Do not overmix; those visible butter pieces are essential for creating flaky layers.
- Add the Liquid: Pour in the cold half-and-half. Use a fork to gently stir until a shaggy, slightly sticky dough forms. Be careful not to over-stir. The dough should just barely come together.
- Fold for Flakiness: Turn the dough out onto a lightly floured surface. Gently bring it together with your hands and pat it into a rough rectangle. Fold the rectangle in thirds, like a letter. Rotate the dough 90 degrees and repeat this pat-and-fold process two more times. This creates the layers.
- Cut the Biscuits: After the final fold, pat the dough out to about 3/4-inch thickness. Use a 2.5-inch biscuit cutter to cut out your biscuits, pressing straight down without twisting. Twisting the cutter can seal the edges and prevent the biscuits from rising to their full potential.
- Bake to Perfection: Arrange the biscuits on your prepared baking sheet so they are just touching. This helps them rise taller. Brush the tops with the melted butter. Bake for 12-15 minutes, or until the tops are beautifully golden brown. Serve warm.
Tips for the Best Homemade Biscuits
Making truly exceptional fluffy homemade biscuits is less about a secret ingredient and more about technique. The single most critical element is temperature. Your butter and your half-and-half must be cold, straight from the refrigerator. When those cold pieces of butter are surrounded by the flour mixture and hit the high heat of the oven, they melt and release steam. This steam pushes the layers of dough apart, creating the light, airy, flaky texture we all love. If your butter is warm, it will simply blend into the flour, resulting in a dense, tough biscuit. If your kitchen is particularly warm, you can even chill your flour and mixing bowl in the freezer for 15-20 minutes before you start. This extra step might seem fussy, but it’s a game-changer for guaranteeing a perfect texture.
The second key to success is a gentle hand. From the moment you add the liquid, your goal is to handle the dough as little as possible. Overworking the dough develops the gluten in the flour, which is great for chewy bread but terrible for tender biscuits. When you’re mixing, stop as soon as the shaggy dough forms. When you’re folding, use gentle pats rather than forceful kneading. This minimal handling keeps the butter pieces intact and the gluten undeveloped. This gentle approach extends to cutting the biscuits. Always press your cutter straight down and pull it straight up. Twisting the cutter seals the edges of the biscuit, which inhibits its ability to rise tall and proud in the oven. Respect the dough, keep it cold, and you’ll be rewarded with the best homemade biscuits every time.
Why are my biscuits dry?
Dry biscuits are almost always a result of a mis-measured flour. Scooping your measuring cup directly into the bag of flour can compact it, causing you to use up to 25% more flour than the recipe calls for. This excess flour absorbs all the moisture, leading to a dry, crumbly result. The best way to measure flour is the “spoon and level” method: use a spoon to fluff up the flour in the bag, then gently spoon it into your measuring cup until it’s overflowing. Finally, use the back of a knife to level off the top. This ensures a light, accurate measurement and prevents a dry, dense final product.
Substitutions & Variations
While this golden homemade biscuits recipe is classic and delicious as is, it also serves as a fantastic canvas for your own culinary creativity. One of the easiest and most traditional swaps is to use buttermilk instead of half-and-half. Buttermilk will add a classic tangy flavor and its acidity will react with the baking powder to give the biscuits an even more tender crumb and a slightly higher rise. If you don’t have buttermilk, you can make a quick substitute by adding one tablespoon of lemon juice or white vinegar to a cup of regular milk and letting it sit for five minutes. This simple swap can completely change the flavor profile and is a favorite for those who love a true Southern-style biscuit.
Beyond buttermilk, the variations are nearly endless. For a savory twist, try adding about 3/4 cup of shredded sharp cheddar cheese and two tablespoons of finely chopped chives or green onions to the dry ingredients. These cheesy herb biscuits are perfect alongside a bowl of soup or chili. For a sweeter version, you can add a little extra sugar to the dough and brush the tops with melted butter and a sprinkle of cinnamon sugar before baking. They become a wonderful treat for breakfast or as a base for strawberry shortcake. Don’t be afraid to experiment. The core of this easy biscuit recipe is very forgiving, allowing you to tailor it to your tastes or what you happen to have on hand.
Can I make these gluten-free?
Yes, you can adapt this recipe to be gluten-free. For the best results, use a high-quality “cup-for-cup” or “measure-for-measure” gluten-free flour blend that contains xanthan gum. These blends are specifically designed to mimic the properties of all-purpose flour. You may find that the gluten-free dough is a bit stickier, so be sure to use plenty of gluten-free flour on your work surface. The final texture will be slightly different—a little more crumbly and less chewy—but still wonderfully delicious.
Golden Homemade Biscuits: Frequently Asked Questions
How do I store leftover biscuits?
Leftover biscuits are best stored in an airtight container at room temperature. They will stay fresh for about two days. Avoid storing them in the refrigerator, as the cold air can make them dry out faster. To reheat, you can wrap them in foil and warm them in a 350°F (175°C) oven for about 5-7 minutes, or until heated through. This method helps them retain their moisture and softness.
Can I make the dough ahead of time?
Absolutely. There are two great ways to do this. You can prepare the dough through the cutting stage, place the unbaked biscuits on a baking sheet, cover them tightly with plastic wrap, and refrigerate for up to 24 hours. When you’re ready, just brush with butter and bake as directed, adding a minute or two to the baking time. For longer storage, you can freeze the unbaked, cut biscuits. Place them on a baking sheet in the freezer until solid, then transfer them to a freezer bag. They can be baked directly from frozen, though they will need an extra 5-8 minutes in the oven.
Why didn’t my biscuits rise?
There are a few common culprits if your biscuits come out flat. The most likely reason is that your baking powder is old or expired. Baking powder loses its leavening power over time, so always check the date. Another reason could be that your butter was too warm, or you overworked the dough, which prevents the steam pockets from forming. Finally, remember not to twist the biscuit cutter. Pressing straight down ensures the edges are open and free to rise as high as possible.
A Taste of Home with Golden Biscuits
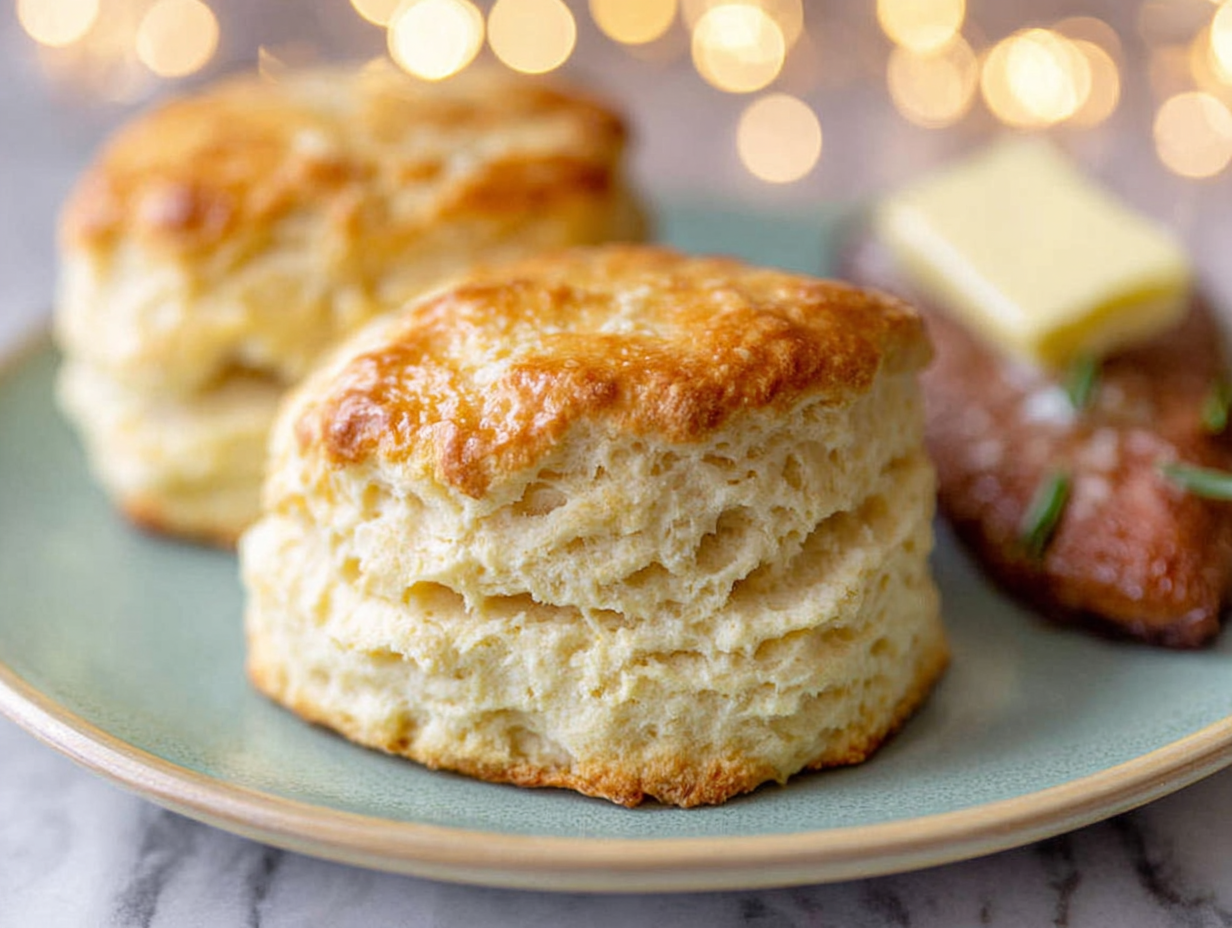
There’s something incredibly satisfying about mastering a recipe that once seemed out of reach. Moving from the pop of a can to the sight of your own perfectly risen, golden homemade biscuits cooling on the counter is a small but powerful kitchen victory. It’s a reminder that the best food doesn’t have to be complicated; it just has to be made with a little care. I hope this recipe demystifies the process for you and brings the warm, comforting aroma of freshly baked biscuits into your home. Whether you serve them with gravy, slather them with butter and honey, or just eat them plain right off the baking sheet, I encourage you to give them a try. Share them with people you love, and enjoy the simple, profound pleasure of a truly great homemade biscuit.
Golden Homemade Biscuits
Ingredients
Equipment
Method
- Prep Your Oven and Pan: Preheat your oven to 425°F (220°C). Line a baking sheet with parchment paper to prevent sticking and ensure an even bake.
- Combine Dry Ingredients: In a large mixing bowl, whisk together the all-purpose flour, baking powder, sugar, and fine sea salt. Whisking helps to evenly distribute the leavening agent, which is crucial for a good rise.
- Cut in the Cold Butter: Add the cold, cubed butter to the flour mixture. Using a pastry blender or your fingertips, quickly cut the butter into the flour until the mixture resembles coarse crumbs with some pea-sized pieces of butter still visible. Do not overmix; those visible butter pieces are essential for creating flaky layers.
- Add the Liquid: Pour in the cold half-and-half. Use a fork to gently stir until a shaggy, slightly sticky dough forms. Be careful not to over-stir. The dough should just barely come together.
- Fold for Flakiness: Turn the dough out onto a lightly floured surface. Gently bring it together with your hands and pat it into a rough rectangle. Fold the rectangle in thirds, like a letter. Rotate the dough 90 degrees and repeat this pat-and-fold process two more times. This creates the layers.
- Cut the Biscuits: After the final fold, pat the dough out to about 3/4-inch thickness. Use a 2.5-inch biscuit cutter to cut out your biscuits, pressing straight down without twisting. Twisting the cutter can seal the edges and prevent the biscuits from rising to their full potential.
- Bake to Perfection: Arrange the biscuits on your prepared baking sheet so they are just touching. This helps them rise taller. Brush the tops with the melted butter. Bake for 12-15 minutes, or until the tops are beautifully golden brown. Serve warm.