There’s a special kind of magic reserved for weekend mornings, a slow-paced rhythm that calls for something a little more special than the usual weekday toast. For me, that magic often smells like Poffertjes. These aren’t just any mini pancakes; they are tiny, pillowy clouds of batter, a beloved treat from the Netherlands. My first time trying these Dutch pancakes was at a bustling street market, watching them being flipped with incredible speed, and the warm, sweet aroma was absolutely intoxicating. This recipe is my way of bringing that cozy, delightful experience right into your kitchen. It’s simpler than you might think to create these authentic, yeast-risen bites that puff up into perfect little spheres of joy.
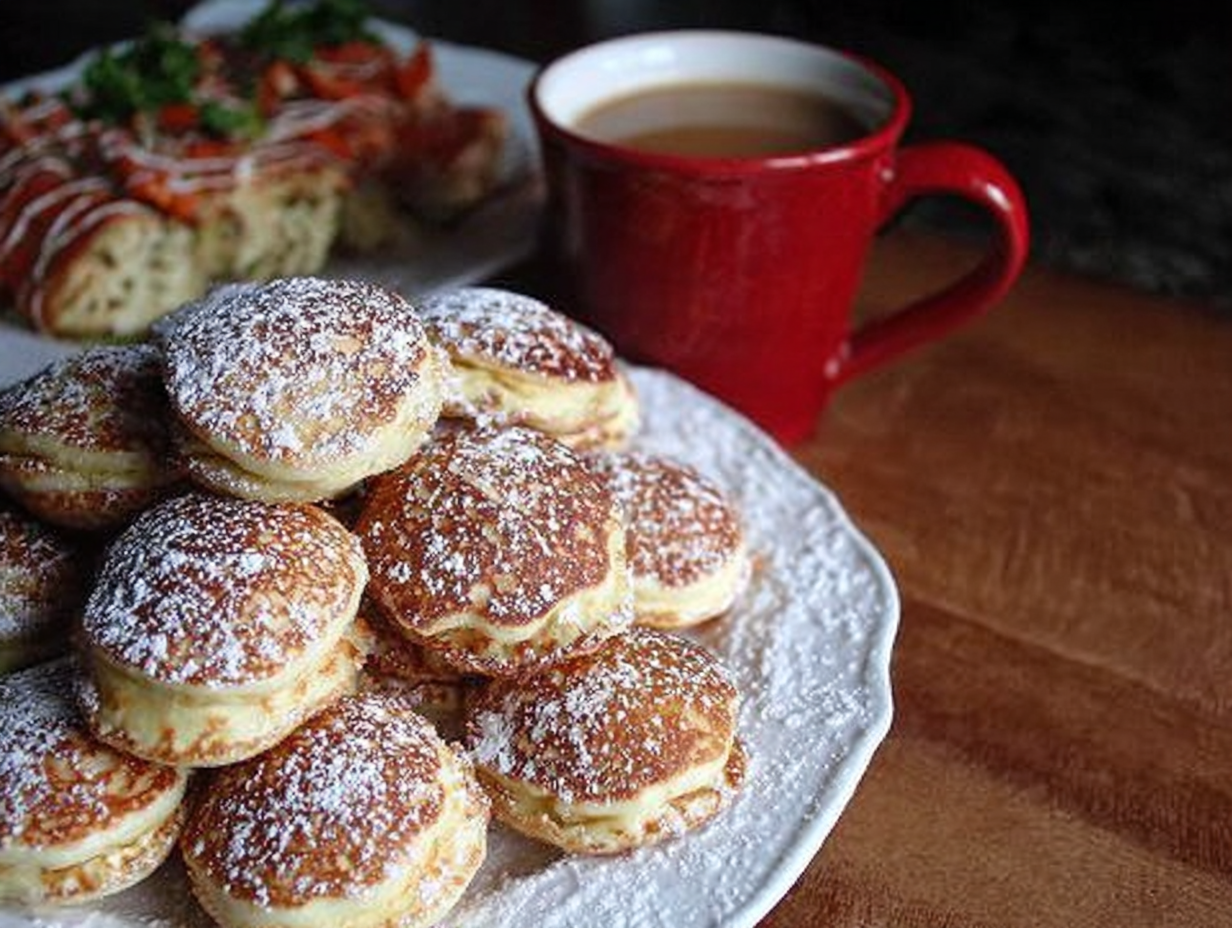
Unlike standard American pancakes that get their lift from baking powder, Poffertjes rely on yeast. This gives them a wonderfully light, almost spongy texture and a subtle, complex flavor that is truly unique. The process of letting the batter rest and rise feels wonderfully traditional, a small pause that promises a delicious reward. The specialized pan, with its shallow dimples, ensures each one cooks into a perfect little globe. Serving them the classic way, with a generous dusting of powdered sugar and a melting pat of butter, is a simple pleasure that feels both rustic and incredibly decadent. They are perfect for a holiday breakfast, a lazy Sunday brunch, or any time you want to make the morning feel like a celebration.
Ingredients for Poffertjes
- 1 tbsp SAF Instant Yeast
- 1 1/2 cups warm milk (90 to 100 degrees F)
- 1 3/4 cups all-purpose flour
- 1 tbsp sugar
- 1/2 tsp salt
- 1 large egg
- Butter, for generously greasing the pan
How to Make Poffertjes (Dutch Pancakes)
- Activate the Yeast: Gently warm the milk until it’s lukewarm, about the temperature of a baby’s bottle (90-100°F). If you don’t have a thermometer, a few drops on your wrist should feel comfortably warm, not hot. Stir in the yeast and let it sit for about 5 minutes. You should see it start to get a little foamy, which means it’s alive and ready to work.
- Mix the Dry Ingredients: While the yeast is proofing, grab a separate large bowl and whisk together the all-purpose flour, sugar, and salt. Creating this dry mix first ensures everything is evenly distributed.
- Combine Wet and Dry: Pour the milk and yeast mixture into the bowl with the dry ingredients. Add the egg. Stir everything together with a spatula or wooden spoon until it’s just combined. A few lumps are perfectly fine! Over-mixing can make your Poffertjes tough, and we want light, airy pancakes.
- Let the Batter Rise: Cover the bowl with a clean kitchen towel or plastic wrap and set it in a warm, draft-free spot in your kitchen. Let the batter rise for at least 30 minutes, but an hour is even better. It should look puffy and have bubbles on the surface.
- Heat and Grease the Pan: Place your poffertjes pan over medium heat. It needs to get properly hot. Add a small piece of butter to each indentation and let it melt and sizzle. This is key for a golden-brown exterior and preventing sticking.
- Cook the Poffertjes: Once the pan is hot, fill each divot about halfway with your risen batter. A squeeze bottle or a small spouted measuring cup works wonders for this. Let them cook for 1-2 minutes, until the edges look set and bubbles appear on the surface.
- Flip and Finish: This is the fun part! Use a wooden skewer or a fork to flip each poffertje over. The traditional technique is to poke the center and deftly turn it. Cook for another 1-2 minutes on the second side until they are golden brown and cooked through.
- Serve Immediately: Transfer the hot Poffertjes to a plate. Serve them the classic Dutch way, with a generous knob of butter that melts all over and a heavy dusting of powdered sugar. Enjoy them while they’re warm!
Tips & Tricks for Perfect Poffertjes
Making truly great Poffertjes is less about a complicated recipe and more about understanding a few key techniques. The batter is where the magic begins. The yeast needs a comfortable environment to thrive, so ensure your milk is lukewarm, not hot. Hot milk will kill the yeast, and your batter won’t rise, resulting in dense, flat little discs instead of puffy clouds. The consistency you’re looking for after mixing is similar to a thick pancake batter. If it seems too thick to pour, you can add another tablespoon of warm milk. If it’s too thin, a sprinkle of flour should do the trick. Remember, a lumpy batter is a happy batter. Over-mixing develops gluten, which is great for bread, but not for these delicate Dutch pancakes.
Your relationship with your poffertjes pan is the next crucial element. These pans, typically made of cast iron, need to be properly seasoned and heated. The first batch is almost always a sacrifice to the cooking gods—use it to test your temperature. The butter in the divots should sizzle merrily, but not smoke violently. If it smokes, the pan is too hot, and you’ll have burnt exteriors and raw interiors. If it melts sluggishly, the pan is too cool, and your Poffertjes will absorb too much butter and won’t puff up properly. Medium heat is usually the sweet spot. Don’t be afraid to adjust the heat between batches to keep it consistent.
Mastering the Signature Flip
The flip can be intimidating, but it’s easier than it looks and so satisfying once you get the hang of it. A long wooden skewer is the traditional tool, but a knitting needle or even a dinner fork will work. The trick is to wait until the top surface is covered in bubbles and the edges look dry. This indicates the bottom is set. Insert the tip of your skewer into the center of the poffertje and give it a quick, confident flick of the wrist. The semi-liquid batter from the top will spill over as it turns, helping to create that signature rounded shape on the other side. It takes a few tries, but soon you’ll be flipping like a pro at an Amsterdam market stall.
Why are my Poffertjes coming out flat?
This is a common question, and the answer usually lies in one of two areas: the batter’s rise or the pan’s heat. First, check your yeast. Was it foamy after sitting in the warm milk? If not, your yeast may be expired. Second, did you give the batter enough time to rise in a warm place? It needs that rest period to develop the air pockets that make Poffertjes so light. The other culprit is a pan that isn’t hot enough. When the batter hits a properly heated, buttered pan, it should sizzle and start to puff immediately. If the pan is too cool, the batter will just sit there, spreading out instead of rising up.
Substitutions and Variations for Poffertjes
While the classic Poffertjes recipe is a thing of beauty, it’s also wonderfully adaptable. You can easily tweak the ingredients to suit your dietary needs or simply to experiment with different flavors. The all-purpose flour provides a tender, reliable crumb, but you don’t have to stop there. For a nuttier, heartier flavor, try substituting up to half of the all-purpose flour with buckwheat flour—this is actually a very traditional approach in the Netherlands. You could also use whole wheat pastry flour for a slightly healthier, yet still tender, result. If you need a gluten-free version, a good quality all-in-one (1-to-1) gluten-free baking blend that contains xanthan gum should work well, though the texture might be slightly denser.
The liquid component is also easy to swap. While whole milk gives a rich flavor, you can substitute it with any plant-based milk like almond, soy, or oat milk for a dairy-free version. The fat content can affect the richness, so a fuller-fat oat milk will yield a result closer to the original than skim almond milk. Just be sure to warm it to the same lukewarm temperature to properly activate the yeast. And don’t forget the butter! For a dairy-free alternative, use a good quality vegan butter or melted coconut oil to grease the pan; this will still give you that necessary crisp exterior on your Dutch pancakes.
Fun Flavor Variations
Once you have the basic Poffertjes technique down, you can start having fun with the flavors. A simple addition of 1/2 teaspoon of vanilla extract or a 1/4 teaspoon of cinnamon or cardamom to the batter adds a lovely warmth. For a decadent treat, you can drop a single chocolate chip or a blueberry into the center of each poffertje right after you pour the batter into the pan. On the savory side, a sprinkle of finely chopped chives or a tiny pinch of grated cheese in the batter can transform these into a fantastic appetizer. The toppings are another area ripe for creativity. Move beyond powdered sugar and try a drizzle of maple syrup, a dollop of Nutella, fresh fruit, or a spoonful of tangy lemon curd.
Can I use a different type of yeast?
Yes, you can. This recipe calls for instant yeast, which is very convenient as it can be mixed right in. If you only have active dry yeast, that works perfectly well too, but it requires a slightly different step. You’ll want to dissolve the active dry yeast in the warm milk along with the tablespoon of sugar and let it sit for about 10 minutes, or until it becomes very foamy and fragrant. The sugar gives the yeast a little something extra to feed on to prove it’s active. Once it’s bubbly, you can proceed with the recipe as written. The rise time for the batter should be about the same.
Frequently Asked Questions About Poffertjes
What if I don’t have a Poffertjes pan?
No poffertjes pan? No problem! While the special pan is what gives them their signature spherical shape, you can still enjoy a similar treat. A Danish aebleskiver pan is a fantastic substitute as it has deeper, rounder wells. If you don’t have one of those either, you can use a regular non-stick skillet. Simply spoon small amounts of batter (about a tablespoon each) onto the hot, buttered skillet to make mini silver dollar pancakes. They won’t be as puffy or round, but they will still have the delicious, yeasty flavor of Poffertjes.
Can I make the batter ahead of time?
Yes, you can prepare the batter in advance. After the initial one-hour rise at room temperature, you can cover the bowl tightly and store it in the refrigerator for up to 24 hours. The cold temperature will slow down the yeast activity. When you’re ready to cook, take the batter out of the fridge and let it sit at room temperature for about 30 minutes to take the chill off before cooking.
How do I store and reheat leftover Poffertjes?
If you have any leftovers, they store quite well. Let them cool completely, then place them in an airtight container in the refrigerator for up to 3 days. To reheat, you can warm them gently in the microwave for about 15-20 seconds or, for a crispier result, place them on a baking sheet in a 350°F (175°C) oven for about 5 minutes. Dust with fresh powdered sugar before serving again.
Conclusion
There is something deeply satisfying about mastering the art of Poffertjes. From the patient wait for the batter to rise to the rhythmic flip-flip-flip of the little pancakes in the pan, the entire process is a joy. These tiny Dutch treats are more than just food; they’re an experience, a chance to slow down and create something truly special. Sharing a warm plate of these buttery, sugar-dusted delights is a perfect way to bring a little bit of Dutch coziness, or ‘gezelligheid’, to your table. I hope this Poffertjes recipe becomes a new favorite in your home, a go-to for creating sweet breakfast memories.
Poffertjes (Dutch Pancakes)
Ingredients
Equipment
Method
- Activate the Yeast: Gently warm the milk until it’s lukewarm, about the temperature of a baby’s bottle (90-100°F). If you don’t have a thermometer, a few drops on your wrist should feel comfortably warm, not hot. Stir in the yeast and let it sit for about 5 minutes. You should see it start to get a little foamy, which means it’s alive and ready to work.
- Mix the Dry Ingredients: While the yeast is proofing, grab a separate large bowl and whisk together the all-purpose flour, sugar, and salt. Creating this dry mix first ensures everything is evenly distributed.
- Combine Wet and Dry: Pour the milk and yeast mixture into the bowl with the dry ingredients. Add the egg. Stir everything together with a spatula or wooden spoon until it’s just combined. A few lumps are perfectly fine! Over-mixing can make your Poffertjes tough, and we want light, airy pancakes.
- Let the Batter Rise: Cover the bowl with a clean kitchen towel or plastic wrap and set it in a warm, draft-free spot in your kitchen. Let the batter rise for at least 30 minutes, but an hour is even better. It should look puffy and have bubbles on the surface.
- Heat and Grease the Pan: Place your poffertjes pan over medium heat. It needs to get properly hot. Add a small piece of butter to each indentation and let it melt and sizzle. This is key for a golden-brown exterior and preventing sticking.
- Cook the Poffertjes: Once the pan is hot, fill each divot about halfway with your risen batter. A squeeze bottle or a small spouted measuring cup works wonders for this. Let them cook for 1-2 minutes, until the edges look set and bubbles appear on the surface.
- Flip and Finish: This is the fun part! Use a wooden skewer or a fork to flip each poffertje over. The traditional technique is to poke the center and deftly turn it. Cook for another 1-2 minutes on the second side until they are golden brown and cooked through.
- Serve Immediately: Transfer the hot Poffertjes to a plate. Serve them the classic Dutch way, with a generous knob of butter that melts all over and a heavy dusting of powdered sugar. Enjoy them while they’re warm!