Ever find yourself in a dessert dilemma, torn between a rich, fudgy brownie and a perfectly chewy chocolate cookie? I’ve been there more times than I can count. This very predicament is what led to the creation of these Fudgy Chewy Browkies, a recipe that has become legendary in my kitchen. It’s the perfect answer when you simply can’t choose. This isn’t just a cookie; it’s a brownie in disguise, born from my most-loved brownie recipe. It delivers all the deep, dark chocolate intensity and gooey texture you crave from a brownie, but with the convenient, shareable form of a cookie. It’s truly one of the Best Brownie Cookie Recipes you’ll ever try.
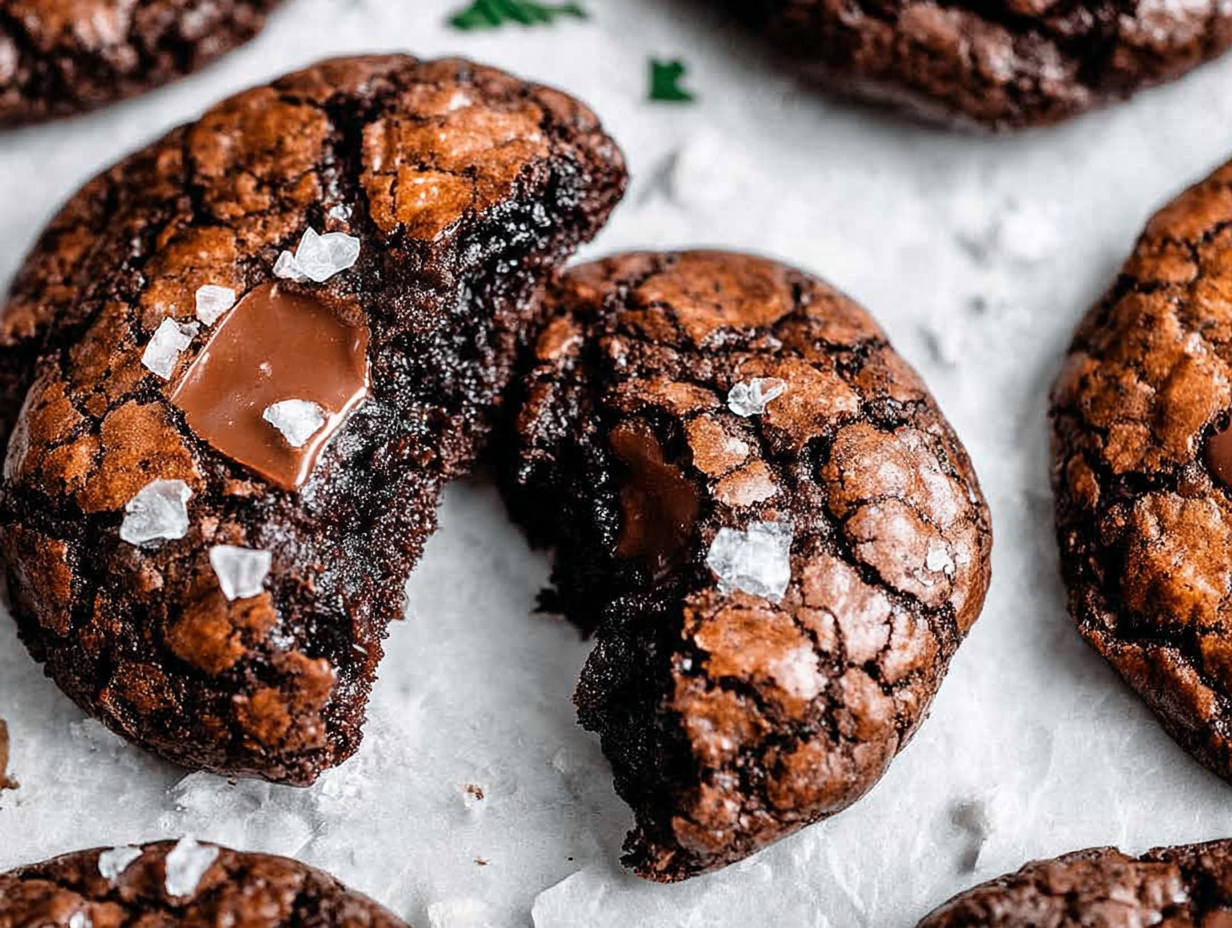
The magic is in the texture. You get that signature crackly, paper-thin sheen on top, which gives way to an incredibly dense and chewy center, studded with pools of melted chocolate chips. They are intensely chocolatey without being overly sweet, thanks to a blend of sugars and a healthy dose of good quality dark chocolate. This recipe is one of those fantastic Easy Desserts With Chocolate Chips that looks and tastes like it came from a high-end bakery but is surprisingly simple to whip up at home. It’s a straightforward process of melting, mixing, and baking, making it one of my go-to Easy Homemade Baked Goods for when a serious chocolate craving hits. Prepare to fall in love with your new favorite cookie-brownie hybrid.
Ingredients for Fudgy Chewy Browkies
- 95 g plain (all-purpose) flour
- 2 tablespoons cocoa powder
- 1 teaspoon baking powder
- 1/4 teaspoon salt
- 225 g dark chocolate, chopped
- 56 g butter (salted or unsalted)
- 2 large eggs, at room temperature
- 100 g caster or granulated sugar
- 90 g Demerara or raw sugar (*this adds extra chewiness and a hint of caramel flavour)
- 1 teaspoon vanilla extract
- 85 g dark or milk chocolate chips
How to Make Fudgy Chewy Browkies
- Get Ready: First, let’s get the oven going. Preheat it to 160°C (320°F) if you have a fan oven, or 170°C (338°F) for a conventional one. Line a large baking tray with parchment paper so nothing sticks.
- Melt the Chocolate: In a heatproof bowl, combine your chopped dark chocolate and the butter. Set this bowl over a small saucepan of gently simmering water (a makeshift double boiler). Make sure the bottom of the bowl doesn’t touch the water. Stir it every so often until everything is beautifully melted and smooth. Take it off the heat and stir in the vanilla extract.
- Whip the Eggs & Sugar: In a separate bowl, combine the eggs and both sugars. Using an electric hand whisk on high speed, beat them together for about 5 minutes. You’re looking for the mixture to become pale, very thick, and fluffy. This step is the secret to getting that classic crackly brownie top, so don’t rush it!
- Mix the Dry Goods: While the eggs are whipping, grab another bowl. Sift the flour, cocoa powder, baking powder, and salt together. Tossing in the chocolate chips now helps coat them in flour, which stops them from all sinking to the bottom. This is one of my favorite little tricks for great Cookies Recipes Chocolate.
- Combine Wet Ingredients: Gently pour the melted chocolate mixture into the whipped eggs and sugar. Use a spatula to fold them together carefully. You want to keep all that air you just whipped into the eggs, so be gentle.
- Fold in the Dry: Now, add the flour mixture to the wet ingredients. Again, fold it in gently with a spatula until you no longer see streaks of flour. The key is to stop mixing as soon as it’s combined to avoid a tough cookie.
- Scoop and Bake: Dollop heaping tablespoons of the batter onto your prepared baking tray. Make sure to leave a good amount of space between them as they will spread. Bake for 12-14 minutes. They should look set around the edges but still be a little soft in the center.
- Cool Down: Once they’re out of the oven, you can sprinkle them with a little flaky sea salt if you like that sweet and salty combination. Let them cool on the tray for about 10 minutes—this allows them to set up properly—before moving them to a wire rack to cool completely.
Tips & Tricks for the Best Fudgy Chewy Browkies
Over the years, I’ve learned that even with a simple recipe, a few small details can make a huge difference. These browkies are a perfect example of an Easy Chocolate Recipe, but these tips will take them from good to absolutely unforgettable. Paying attention to these little things is what elevates your Easy Homemade Baked Goods and gives you that professional bakery quality at home. From the texture to the taste, a little extra care goes a long way, especially when it comes to Dark Chocolate Baking.
The Secret to the Crackly Top
That beautiful, shiny, crackly top isn’t just luck; it’s a result of technique. The most crucial step is whipping the eggs and sugars together for a full 5 minutes with an electric mixer. This process dissolves the sugar and incorporates a lot of air, creating a light meringue-like structure on the surface of the browkie as it bakes. When the hot air hits it in the oven, it sets quickly into that signature paper-thin, crackly crust. If you skip or shorten this step, your browkies will still be delicious, but they’ll have a duller, softer top. So, be patient and give them a good whip!
Don’t Overbake!
The line between a perfectly fudgy browkie and a dry, crumbly one is very fine. The key is to pull them from the oven when they still look slightly underdone in the very center. The edges should be set, and the tops should be crackly, but the middle will still be soft. They will continue to cook and set on the hot baking tray after you take them out. This residual heat cooking is what guarantees that gooey, brownie-like texture inside. I recommend checking them at the 12-minute mark. If you wait until they look fully cooked in the oven, they will be overdone by the time they cool.
Why didn’t my browkies spread?
If your browkies came out more like tall mounds than cookies, there are a couple of likely culprits. The most common reason is that the butter and chocolate mixture was too hot when you added it to the egg mixture. This can start to cook the eggs and thicken the batter prematurely. Let the chocolate cool down for a few minutes before folding it in. Another reason could be measuring the flour incorrectly. If you pack too much flour into your measuring cup, the dough will be too stiff to spread properly. Always spoon your flour into the cup and level it off for the most accurate measurement.
Fudgy Chewy Browkies: Substitutions & Variations
One of the best things about this recipe is how adaptable it is. While the original version is a crowd-pleaser, you can easily tweak it to suit your tastes or use what you have on hand. Think of this as a base for your own creations. Whether you’re a fan of different types of chocolate or love a bit of crunch, there are plenty of ways to make these Fudgy Chewy Browkies your own. These suggestions can turn a simple Cookie Recipes Brownie into a signature dessert.
Chocolate Swaps and Add-Ins
- Chocolate Chips: Feel free to swap the dark or milk chocolate chips for white chocolate, peanut butter, or even butterscotch chips. A combination is also delicious!
- Go Nuts: For added texture, fold in about 60g (1/2 cup) of chopped walnuts or pecans along with the dry ingredients.
- Espresso Powder: Add a teaspoon of instant espresso powder with the cocoa powder. It won’t make the browkies taste like coffee; instead, it will deepen and enhance the chocolate flavour.
- Mint Chocolate: Use mint-flavoured dark chocolate for the melted base or fold in mint chocolate chips for a refreshing twist.
Can I make these gluten-free?
Yes, you can! This recipe works quite well with a good-quality gluten-free all-purpose flour blend. Look for one that contains xanthan gum to help with the structure and chewiness. Simply substitute the plain flour with the gluten-free blend in a 1:1 ratio. The texture may be slightly different—sometimes a little more delicate—but they will still be incredibly fudgy and delicious. It’s a great way to adapt one of the Best Brownie Cookie Recipes for different dietary needs.
Frequently Asked Questions
How do I store these Fudgy Chewy Browkies?
Store the browkies in an airtight container at room temperature. They will stay fresh and chewy for up to 4 days. If anything, I find their fudgy texture gets even better on the second day as the flavours meld together.
Can I make the dough ahead of time?
Absolutely. You can prepare the dough and chill it in the refrigerator for up to 24 hours. The dough will be much firmer, so you may need to let it sit at room temperature for about 20-30 minutes to make it easier to scoop. Chilled dough tends to spread less, so your browkies might be a bit thicker, which isn’t a bad thing!
What does “folding” the ingredients mean and why is it important?
Folding is a gentle mixing technique used to combine light, airy ingredients with heavier ones without deflating the mixture. Instead of stirring vigorously, you use a spatula to cut down through the middle of the batter, scrape along the bottom of the bowl, and bring the batter up and over the top. It’s crucial in this recipe because you’ve worked hard to whip air into the eggs and sugar. Folding preserves that air, which results in a lighter, less dense browkie with that perfect crackly top.
The Perfect End to Your Brownie vs. Cookie Debate
And there you have it—the end of the dessert indecision. These Fudgy Chewy Browkies are more than just a recipe; they are a solution. They are the peace treaty between your brownie and cookie cravings, delivering the best of both worlds in every single bite. The experience of watching the simple ingredients transform into these glossy, crackled-top beauties is almost as satisfying as eating them. This is one of those Easy Chocolate Recipe creations that will bring smiles to faces and have everyone asking for the recipe. I hope you enjoy the rich, chocolatey journey of making them as much as you enjoy sharing them.