There’s something uniquely special about sending a gift that’s made with your own two hands. These delicious letterbox brownies are more than just a dessert; they’re a warm, fudgy hug packed into a box, ready to surprise someone you care about. I started making these years ago when I wanted to send a little something to a friend who lived far away. A store-bought gift felt impersonal, but a full-sized cake was impractical. The solution was a simple, classic brownie, sturdy enough to travel but decadent enough to feel like a real treat. This recipe became my go-to for creating the best Diy Valentines Food Treats, and it’s perfect for anyone looking for heartfelt, homemade gift ideas.
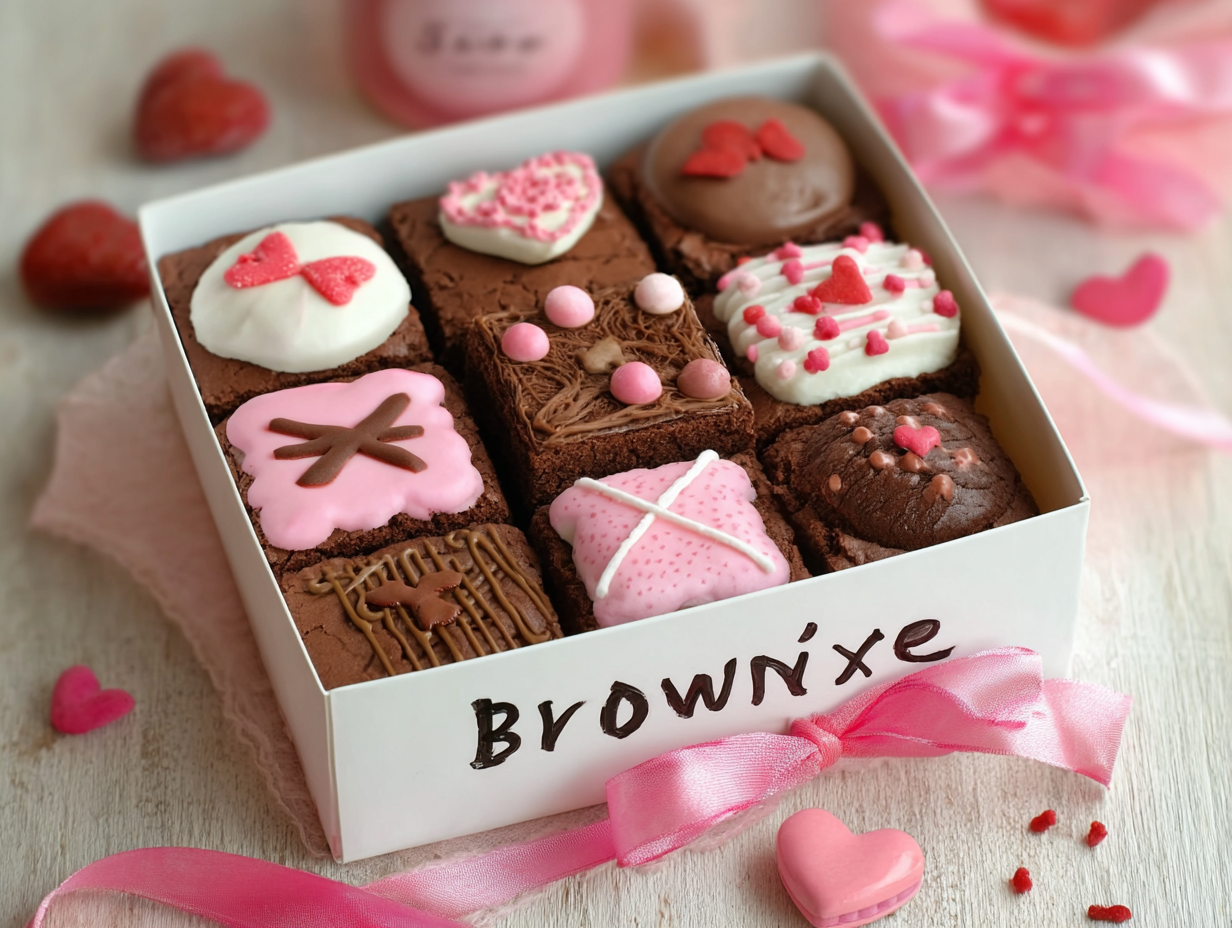
Forget the generic store-bought options this year. Imagine your loved one opening a small package to find rich, chocolatey brownies made just for them. It’s one of those Little Valentine Gift Ideas that speaks volumes. This recipe is incredibly straightforward, relying on simple ingredients to create a truly memorable, deeply chocolatey flavor. The texture is just right – not too cakey, not too gooey, but a perfect, fudgy in-between that holds up well. Whether you’re an experienced baker or just starting, you can confidently whip these up. They are the star of our Valentines Day Gift Hampers and a simple way to show you care without a lot of fuss. Let’s get baking and create a gift that’s as sweet as the thought behind it.
Ingredients for Letterbox Brownies
The beauty of a classic brownie recipe lies in its simplicity. You don’t need a long list of fancy or hard-to-find ingredients to achieve a rich, satisfying chocolate flavor. This recipe uses pantry staples that come together to create something truly special. The key is in the quality and ratio of these simple components. Using good quality unsalted butter and unsweetened cocoa powder will make a noticeable difference in the final taste, giving your brownies a deep, complex chocolate character that stands out. These are the foundational elements for perfect Baked Goods For Valentines Day, ensuring a result that’s both reliable and delicious every single time. Before you begin, gather everything so the mixing process is smooth and seamless. It’s a small step that makes the entire baking experience more relaxed and enjoyable, setting you up for success from the very start.
- 1/2 cup (113g) unsalted butter
- 1 cup (200g) granulated sugar
- 2 large eggs, at room temperature
- 1 teaspoon vanilla extract
- 1/3 cup (30g) unsweetened cocoa powder
- 1/2 cup (60g) all-purpose flour
- 1/4 teaspoon salt
- 1/4 teaspoon baking powder
Why are room temperature eggs important?
Using room temperature eggs is a small detail that makes a big difference. Cold eggs don’t emulsify as easily into the batter, which can result in a dense or uneven texture. Room temperature eggs, on the other hand, trap air more efficiently, helping to create a lighter, more uniform crumb. This is especially important for achieving that perfect fudgy consistency we all love in a brownie. To quickly bring eggs to room temperature, simply place them in a bowl of warm (not hot) water for about 5-10 minutes before you start baking.
How to Make the Perfect Letterbox Brownies
Following these steps will guide you to brownie perfection. The process is wonderfully simple, which is why this is one of my favorite Valentines Bakes Ideas. The magic happens in the mixing; be careful not to overmix the batter once the flour is added. Overmixing develops the gluten in the flour, which can lead to tough, cakey brownies instead of the dense, fudgy texture we’re aiming for. Stir just until the last streaks of flour disappear. This gentle approach ensures a tender result. When you pour the batter into the pan, it should be thick, glossy, and smooth. If you want to create a Heart Brownie for Valentine’s Day, you can either use a heart-shaped pan or simply use a cookie cutter to cut out heart shapes once the brownies have cooled completely. It’s a simple touch that transforms them into a truly special gift.
- Prepare Your Pan and Oven: First things first, preheat your oven to 350°F (175°C). Take your 8-inch square pan and grease it well with butter or a non-stick spray. For extra insurance and easy removal, I recommend lining the pan with parchment paper, leaving a little overhang on two sides to act as handles.
- Melt Butter and Mix Wet Ingredients: In a medium saucepan, melt the unsalted butter over low heat. Once it’s fully melted, remove it from the heat. Stir in the granulated sugar until it’s well combined. Then, add the room temperature eggs one at a time, followed by the vanilla extract. Mix until everything is smooth and glossy.
- Incorporate Dry Ingredients: Add the cocoa powder, all-purpose flour, salt, and baking powder directly into the saucepan with the wet ingredients. Use a spatula or wooden spoon to fold everything together gently. Stop mixing as soon as you no longer see dry streaks of flour. This is the secret to a fudgy texture!
- Spread and Bake: Pour the thick, rich batter into your prepared pan and use the spatula to spread it evenly into the corners. Place the pan on the center rack of your preheated oven.
- Bake to Perfection: Bake for 20 to 25 minutes. The edges should look set, and a toothpick inserted into the center should come out with moist crumbs attached, but not wet batter. Be very careful not to overcook, as this will dry them out.
- Cool Completely: This might be the hardest step! Let the brownies cool completely in the pan on a wire rack before cutting. This allows them to set properly, ensuring clean cuts and a perfect fudgy texture. Once cooled, you can lift them out using the parchment paper handles and slice them into squares, ready for your Valentines Cookie Boxes Diy.
Tips & Tricks for the Best Letterbox Brownies
After making countless batches of brownies, I’ve learned a few things that can elevate them from good to absolutely unforgettable. One of the most important tips is to trust your senses when checking for doneness. Ovens can vary, so the “20 to 25 minutes” is a guideline. The visual cues—set edges and a slightly soft center—are more reliable. A toothpick test is your best friend here; you want moist, sticky crumbs, not wet batter or a completely clean pick. Pulling them out at that perfect moment guarantees a dense, fudgy interior. Another trick is to let them cool completely, and I mean completely, before slicing. I know it’s tempting to dig in while they’re warm, but patience pays off. A cooled brownie will be less crumbly and will give you those beautiful, clean-edged squares that look so professional. For an even cleaner cut, use a sharp knife and wipe it clean between each slice. These little details make them a perfect Gift For Him Valentines Day, showing extra thought and care.
How do I get that perfect crackly, paper-thin top?
That beautiful, shiny crust on top of a brownie is the result of dissolving the sugar properly and creating a thin meringue-like layer. The key is to beat the eggs and sugar together thoroughly until the mixture becomes lighter in color and slightly aerated. When you add the sugar to the warm, melted butter, it helps the sugar dissolve. Whisking the eggs in vigorously for a minute or two before adding the dry ingredients helps create that delicate, crackly top. This simple step doesn’t change the flavor, but it provides that classic brownie appearance that everyone loves, making your homemade treats look like they came from a high-end bakery. It’s a simple technique that elevates your Cute Valentines Gift Ideas to the next level.
Substitutions & Variations for Your Brownies
While this classic recipe is fantastic on its own, it also serves as a wonderful canvas for your creativity. Don’t be afraid to experiment with different additions to make these brownies uniquely yours. Think about what the recipient loves and customize the batch just for them. This is how you can turn a simple recipe into one of the most thoughtful Little Valentine Gift Ideas. For a bit of texture, try adding a half-cup of chopped nuts like walnuts or pecans, or a handful of chocolate chips for an extra decadent chocolate punch. A swirl of peanut butter or salted caramel on top of the batter just before baking can add a whole new dimension of flavor. Even a simple sprinkle of flaky sea salt on top after baking can enhance the chocolate flavor in a surprising and delicious way. These small tweaks are perfect for personalizing your Valentines Day Gift Hampers.
- For a Mocha Twist: Add a teaspoon of instant espresso powder along with the cocoa powder. It won’t make the brownies taste like coffee, but it will deepen and intensify the chocolate flavor.
- Add Some Crunch: Gently fold in 1/2 cup of chopped walnuts, pecans, or semi-sweet chocolate chunks into the batter before spreading it in the pan.
- Gluten-Free Option: You can substitute the all-purpose flour with a good quality 1-to-1 gluten-free baking flour blend. The texture will be very similar, making it an easy swap for those with dietary restrictions.
- Flavor Extracts: Swap the vanilla extract for 1/2 teaspoon of peppermint extract for a mint-chocolate version, or a little orange extract for a chocolate-orange flavor profile.
Frequently Asked Questions
How should I package these brownies for mailing?
To ensure your letterbox brownies arrive fresh and intact, proper packaging is key. First, make sure the brownies are completely cooled. I recommend wrapping them individually or in pairs (back-to-back) with plastic wrap. This locks in moisture. Then, place them in a sturdy, shallow box or a small tin. You can find “large letter” sized boxes online that are perfect for this. Fill any empty space in the box with crumpled parchment paper or bubble wrap to prevent the brownies from shifting around during transit. This makes them a reliable and delightful Diy Valentines Food Treats idea.
Can I double this recipe?
Absolutely! This recipe doubles beautifully. Simply double all the ingredients and bake it in a 9×13-inch pan. You will need to adjust the baking time, likely adding another 10-15 minutes. Start checking for doneness around the 30-minute mark. Doubling the recipe is a great idea if you’re making treats for multiple people or building several Valentines Day Gift Hampers.
How long do these brownies stay fresh?
Stored in an airtight container at room temperature, these brownies will stay fresh and delicious for about 3 to 4 days. If you’re mailing them, they should be sent via a next-day or two-day delivery service to ensure they arrive at their best. They also freeze exceptionally well for up to 3 months if you want to make them ahead of time.
A Sweet, Heartfelt Conclusion
Baking these letterbox brownies is more than just following a recipe; it’s about creating a moment of joy for someone else. It’s the act of mixing, baking, and carefully packing a treat that says, “I’m thinking of you.” In a world of digital messages, a tangible, homemade gift feels incredibly meaningful. This simple, fudgy brownie is one of the most versatile Valentines Bakes Ideas, perfect for a partner, a friend, or a family member. I hope you enjoy the process of making these as much as your loved ones will enjoy eating them. So, go ahead, preheat your oven, and bake a little love to share.
Letterbox Brownies
Ingredients
Equipment
Method
- Prepare Your Pan and Oven: First things first, preheat your oven to 350°F (175°C). Take your 8-inch square pan and grease it well with butter or a non-stick spray. For extra insurance and easy removal, I recommend lining the pan with parchment paper, leaving a little overhang on two sides to act as handles.
- Melt Butter and Mix Wet Ingredients: In a medium saucepan, melt the unsalted butter over low heat. Once it’s fully melted, remove it from the heat. Stir in the granulated sugar until it’s well combined. Then, add the room temperature eggs one at a time, followed by the vanilla extract. Mix until everything is smooth and glossy.
- Incorporate Dry Ingredients: Add the cocoa powder, all-purpose flour, salt, and baking powder directly into the saucepan with the wet ingredients. Use a spatula or wooden spoon to fold everything together gently. Stop mixing as soon as you no longer see dry streaks of flour. This is the secret to a fudgy texture!
- Spread and Bake: Pour the thick, rich batter into your prepared pan and use the spatula to spread it evenly into the corners. Place the pan on the center rack of your preheated oven.
- Bake to Perfection: Bake for 20 to 25 minutes. The edges should look set, and a toothpick inserted into the center should come out with moist crumbs attached, but not wet batter. Be very careful not to overcook, as this will dry them out.
- Cool Completely: This might be the hardest step! Let the brownies cool completely in the pan on a wire rack before cutting. This allows them to set properly, ensuring clean cuts and a perfect fudgy texture. Once cooled, you can lift them out using the parchment paper handles and slice them into squares, ready for your Valentines Cookie Boxes Diy.