Oh, the sheer joy of a bubbling, cheesy pizza! And then there’s the heartwarming embrace of a savory pot pie, with its flaky crust and delightful filling. What if I told you that you could combine these two culinary titans into one glorious, utterly irresistible dish? Prepare yourselves, because we’re diving headfirst into the magical world of Pizza Pot Pies!
These aren’t just any pies; they’re individual portions of pure happiness, packed with all the flavors you adore from your favorite pizza, but with the added cozy comfort of a pot pie. Imagine a golden, buttery crust encasing a luscious filling of tangy marinara, gooey mozzarella, zesty pepperoni, and whatever other deliciousness your heart desires. Each bite is a symphony of textures and tastes, a perfect blend of familiar comfort and exciting novelty. It’s truly the ultimate comfort food mash-up, ready to become a beloved staple in your dinner rotation.
What Exactly Are Pizza Pot Pies?
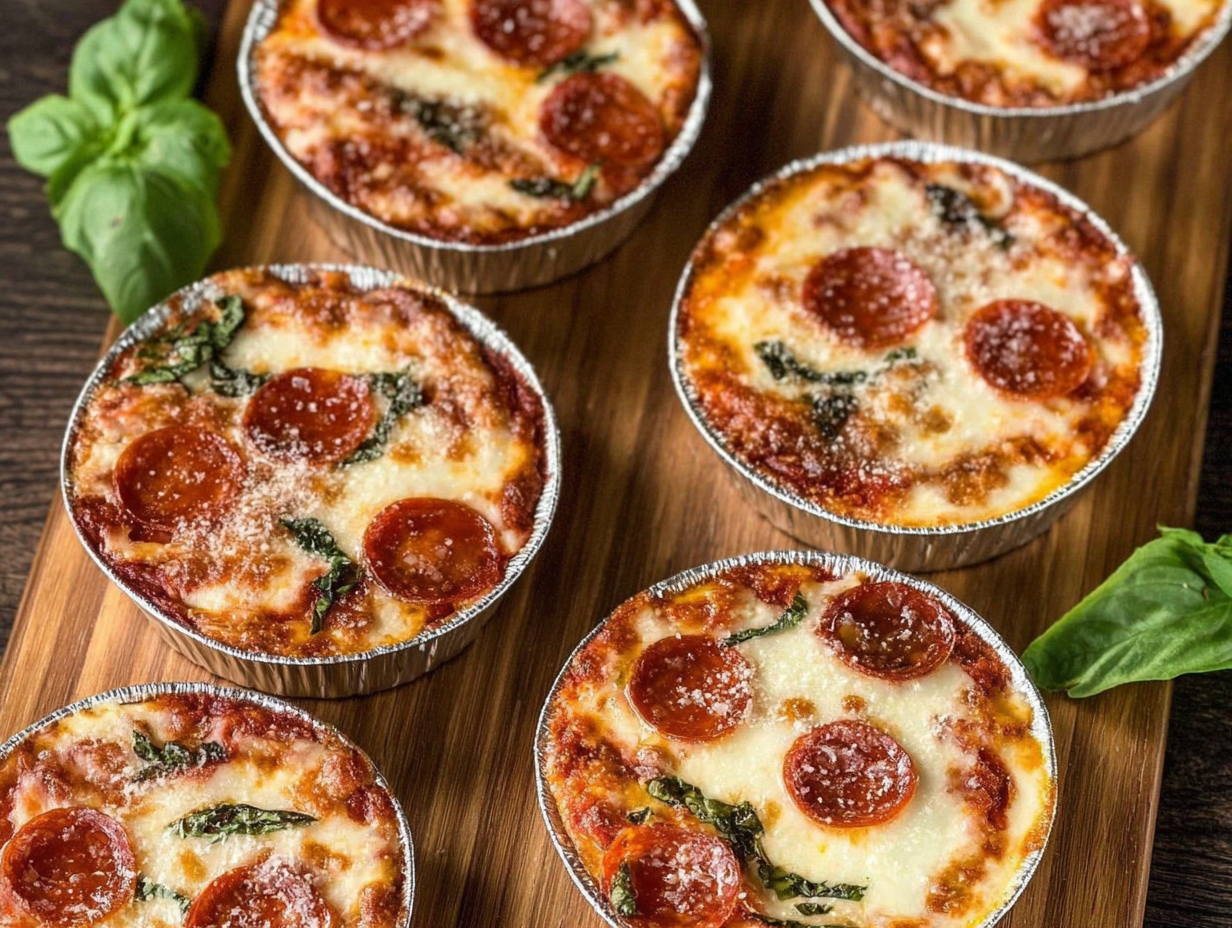
At their core, Pizza Pot Pies are exactly what they sound like: a miniature pizza baked inside a ramekin or oven-safe bowl, topped with a delightful pizza dough crust. Think of it as a deconstructed pizza, reimagined as a personal, portable, and incredibly satisfying meal. Instead of a flat crust on the bottom, the dough forms a cozy cup, holding all the saucy, cheesy goodness within. Then, a final layer of dough is draped over the top, creating that iconic pot pie lid that bakes up golden and irresistibly flaky.
They offer the best of both worlds: the vibrant, customizable flavors of pizza combined with the warm, hearty satisfaction of a classic pot pie. They are fantastic for portion control, make for an adorable presentation, and are incredibly versatile. Whether you’re feeding a family, hosting a casual get-together, or simply looking for a fun and delicious weeknight dinner, these little pies are guaranteed to bring smiles to every face.
Why You’ll Fall Head Over Heels for This Recipe
There are so many reasons why these Pizza Pot Pies are about to become your new culinary obsession. First and foremost, they are incredibly easy to make! If you can handle a roll of refrigerated pizza dough and a can of sauce, you’re halfway there. There’s no complicated shaping or tossing involved, just simple assembly that even beginner cooks can master with confidence. This makes them perfect for those busy weeknights when you crave something homemade and delicious but are short on time.
Beyond their simplicity, the customization factor is truly a game-changer. These pies are a blank canvas for your pizza dreams! Love supreme? Load it up! Prefer a vegetarian delight? Pile on the veggies! Each family member can even create their own personalized pot pie, ensuring everyone gets exactly what they want. It’s a fantastic way to cater to different tastes without having to make multiple separate meals. Plus, they’re just plain fun to eat, breaking open that golden crust to reveal the molten cheese and savory fillings inside is an experience in itself.
Gather Your Ingredients for Pizza Pot Pie Perfection
One of the beauties of this recipe is its straightforward ingredient list. You likely have many of these items in your pantry already! We’re keeping things simple and approachable, ensuring you can whip up these delicious pies without a special trip to the store. Here’s what you’ll need to create your own ultimate comfort food mash-up:
- 1 package refrigerated pizza dough (the ultimate shortcut, or make your own for an extra touch!)
- 1 1/2 cups marinara sauce or your favorite pizza sauce
- 1 1/2 cups shredded mozzarella cheese (because can you ever have too much cheese?)
- 1/2 cup pepperoni slices (or get creative with sausage, mushrooms, bell peppers, olives – whatever calls to you!)
- 1/4 cup grated Parmesan cheese
- 1 teaspoon dried oregano
- 1 teaspoon dried basil
- 1/2 teaspoon garlic powder
- 1/4 teaspoon red pepper flakes (for a little kick, totally optional!)
- Olive oil for brushing (optional, but it gives that beautiful golden crust)
Your Step-by-Step Guide to Crafting These Delights
Ready to get cooking? Follow these easy steps, and you’ll be enjoying warm, bubbly Pizza Pot Pies in no time. The process is designed to be simple and enjoyable, leading you to a truly satisfying meal.
- Step 1: Preheat and Prepare. Kick things off by preheating your oven to a cozy 375°F (190°C). While it heats up, lightly grease 4-6 small ramekins or other oven-safe bowls. The number you’ll need depends on their size and how generously you plan to fill them.
- Step 2: Roll Out the Dough. Unroll your refrigerated pizza dough onto a lightly floured surface. Roll it out gently until it’s about 1/8 inch thick. This ensures a nice, even crust.
- Step 3: Cut the Dough Circles. Using a round cutter, a knife, or even the rim of one of your ramekins as a guide, cut the dough into circles or squares. Make sure they’re large enough to fit into your ramekins, leaving about an inch of dough hanging over the sides. This overhang will become your charming pot pie lid.
- Step 4: Form the Crust. Carefully press each dough piece into the bottom and up the sides of your greased ramekins, forming a snug little crust. Don’t worry if it’s not perfect; rustic is charming!
- Step 5: Sauce it Up! Spoon about 2 tablespoons of your delicious pizza sauce into the bottom of each prepared crust. This is the foundation of flavor!
- Step 6: Layer the Mozzarella. Sprinkle 2-3 tablespoons of shredded mozzarella cheese over the sauce. This is where the magic really starts to happen, creating that irresistible gooey layer.
- Step 7: Add Your Toppings. Now for the fun part! Add a few slices of pepperoni or your chosen toppings. Don’t overcrowd them; you want a good balance of dough, sauce, cheese, and toppings.
- Step 8: Season with Flavor. Sprinkle a little grated Parmesan cheese, dried oregano, basil, garlic powder, and those optional red pepper flakes over your filling. These herbs and spices really elevate the pizza experience.
- Step 9: More Cheese, Then Fold. Top each pot pie with a bit more mozzarella cheese. Then, take the overhanging dough and gently fold it over the top, partially covering the filling. This creates that classic pot pie look and helps seal in the flavors.
- Step 10: Brush for Golden Perfection. For an extra golden and slightly crisp finish, brush the tops of the folded dough with a little olive oil. This step is optional but highly recommended for that beautiful bake.
- Step 11: Bake to Bubbly Goodness. Place your ramekins on a baking sheet (to catch any potential drips) and pop them into your preheated oven. Bake for 20-25 minutes, or until the dough is wonderfully golden brown and the cheese is melted, bubbly, and irresistible.
- Step 12: A Moment to Cool. It’s tempting, but let those glorious pies cool for about 5 minutes before serving. This allows the filling to set slightly and prevents burned tongues.
- Step 13: Serve and Enjoy! Serve your Pizza Pot Pies hot, perhaps with a side of extra marinara sauce for dipping. Get ready for a chorus of happy sighs!
Unleash Your Inner Chef: Customization is Key!
One of the most exciting aspects of Pizza Pot Pies is their incredible adaptability. Don’t feel confined by the pepperoni! This recipe is a fantastic canvas for your culinary creativity. Think about your favorite pizza combinations and bring them to life in these individual pies.
For meat lovers, consider cooked crumbled sausage, diced ham, or even tiny meatballs. If you’re a veggie enthusiast, sautéed mushrooms, bell peppers, onions, black olives, or even a sprinkle of spinach would be divine. Want to get really adventurous? Try a BBQ chicken pot pie with a smoky barbecue sauce base, cooked chicken, red onion, and cilantro. Or perhaps a white pizza version with a creamy Alfredo sauce, ricotta, and garlic. The possibilities are truly endless, limited only by your imagination and what you have on hand. It’s a wonderful opportunity to use up leftover ingredients and prevent food waste, all while creating something spectacular.
Tips for Pizza Pot Pie Success
- Don’t Overfill: It’s tempting to pack in all the deliciousness, but overfilling your ramekins can lead to spills and a soggy crust. Leave a little room for the cheese to melt and bubble.
- Vent the Crust: While folding the dough over, you can make a small slit in the center or poke a few holes with a fork. This allows steam to escape, preventing a puffy, unbaked crust and ensuring everything cooks evenly.
- Prevent Sticking: Make sure your ramekins are thoroughly greased! This will make serving a breeze and ensure your beautiful crust comes out intact.
- Dough Thickness Matters: Aim for that 1/8 inch thickness. Too thick, and your crust might be doughy; too thin, and it might tear easily.
- Chill the Dough (if homemade): If you’re using homemade pizza dough, a brief chill in the fridge can make it easier to handle and roll out.
Serving Suggestions and Meal Prep Ideas
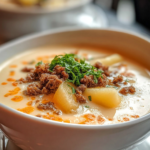
These Pizza Pot Pies are hearty enough to be a complete meal on their own, but they also pair beautifully with a fresh, crisp side salad tossed in a light vinaigrette. A simple green salad provides a lovely contrast to the rich, cheesy pies. For an extra touch, you could serve them alongside some garlic bread or a bowl of warm tomato soup for an ultimate comfort food experience. They are also fantastic with a sprinkle of fresh basil or parsley on top for a pop of color and freshness.
Looking to get ahead? You can assemble these pies up to a day in advance! Simply prepare them through Step 10, cover them tightly with plastic wrap, and refrigerate. When you’re ready to bake, remove them from the fridge about 30 minutes beforehand to come to room temperature, then bake as directed, adding a few extra minutes to the baking time if needed. They also reheat wonderfully in the oven, making them perfect for lunch the next day. Imagine pulling one out of the fridge for a quick, satisfying meal – pure bliss!
A New Family Favorite Awaits!
Pizza Pot Pies truly offer a delightful twist on two beloved classics. They bring together the playful joy of pizza with the comforting embrace of a pot pie, resulting in a dish that’s both exciting and deeply satisfying. Whether you’re gathering for a family dinner, hosting friends, or simply treating yourself to something special, these individual pies are sure to be a showstopper.
So, roll up your sleeves, gather your favorite toppings, and get ready to create some culinary magic. This recipe is more than just food; it’s an experience, a moment of warmth and happiness shared around the table. Give these Pizza Pot Pies a try, and prepare to welcome a delicious new favorite into your recipe collection!
Pizza Pot Pies
Ingredients
Equipment
Method
- Preheat your oven to a cozy 375°F (190°C). Lightly grease 4-6 small ramekins or other oven-safe bowls.
- Unroll your refrigerated pizza dough onto a lightly floured surface. Roll it out gently until it’s about 1/8 inch thick.
- Using a round cutter, a knife, or the rim of one of your ramekins as a guide, cut the dough into circles or squares large enough to fit into your ramekins, leaving about an inch of dough hanging over the sides.
- Carefully press each dough piece into the bottom and up the sides of your greased ramekins, forming a snug little crust.
- Spoon about 2 tablespoons of your delicious pizza sauce into the bottom of each prepared crust.
- Sprinkle 2-3 tablespoons of shredded mozzarella cheese over the sauce.
- Add a few slices of pepperoni or your chosen toppings, ensuring not to overcrowd.
- Sprinkle a little grated Parmesan cheese, dried oregano, basil, garlic powder, and optional red pepper flakes over your filling.
- Top each pot pie with a bit more mozzarella cheese. Then, gently fold the overhanging dough over the top, partially covering the filling.
- For an extra golden and slightly crisp finish, brush the tops of the folded dough with a little olive oil (optional).
- Place your ramekins on a baking sheet and bake for 20-25 minutes, or until the dough is wonderfully golden brown and the cheese is melted and bubbly.
- Let those glorious pies cool for about 5 minutes before serving.
- Serve your Pizza Pot Pies hot, perhaps with a side of extra marinara sauce for dipping.