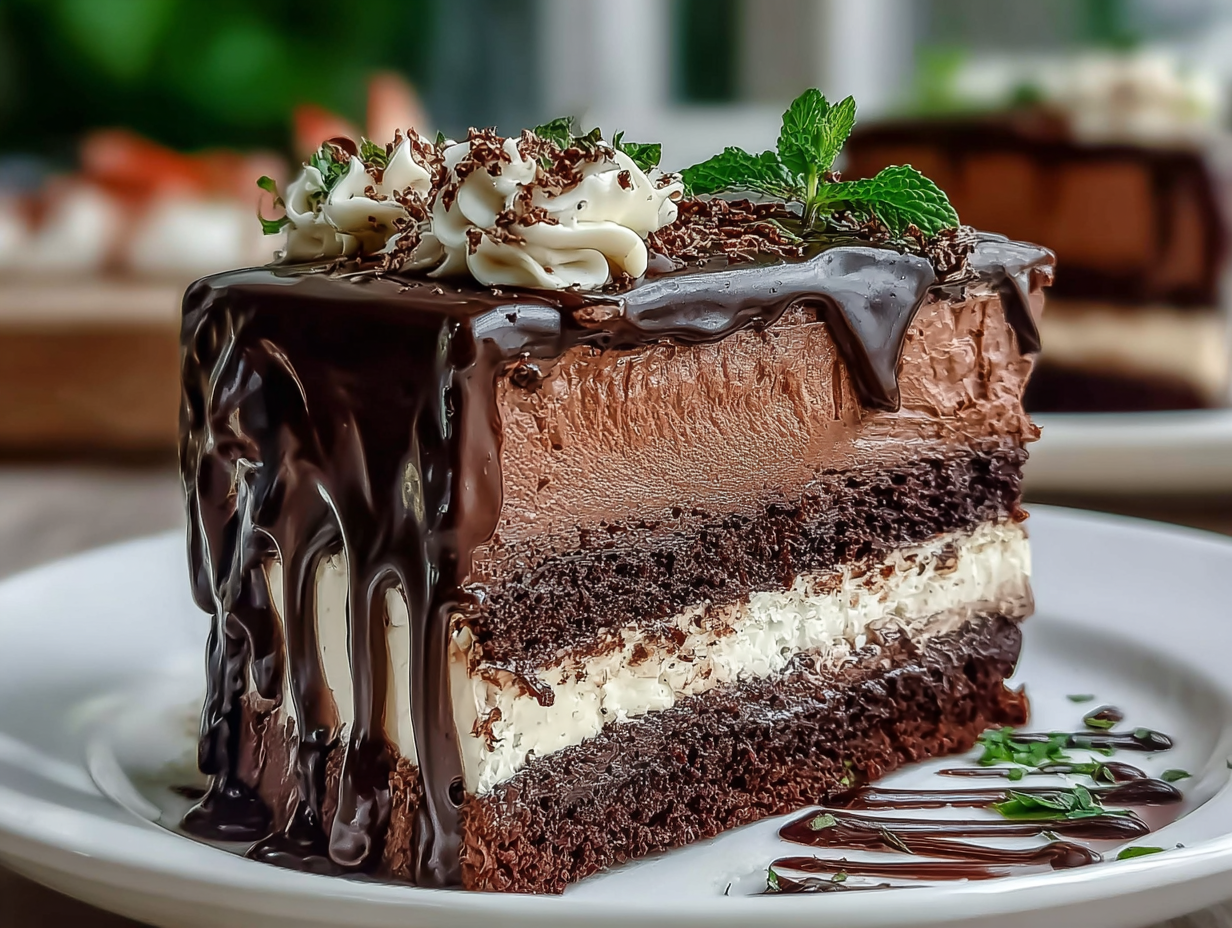
There are some desserts that just feel like an event. They’re the ones you dream up for milestone birthdays, quiet anniversaries, or those cozy winter evenings when you need something truly special. This Chocolate Tuxedo Cake is exactly that—a showstopper. Forget basic cakes; this is a true Gourmet Chocolate Cake Recipe, designed to create a “wow” moment. It’s the kind of cake that silences a room when you bring it to the table, with its dramatic layers of rich chocolate cake, ethereal white and dark chocolate mousse, and a mirror-like ganache that drips elegantly down the sides. It’s a project, yes, but one that is deeply rewarding and surprisingly manageable, I promise.
The first time I made this, I was looking for birthday cakes adults in my life would genuinely love—something sophisticated but not stuffy. This recipe was born from that search, combining classic flavors into one of the most beautiful dessert recipes I’ve ever made. The magic is in the contrast. The deep, slightly bitter notes of the dark chocolate cake and mousse are perfectly balanced by the sweet, creamy whisper of the white chocolate mousse. It’s a symphony of textures and flavors that makes it one of the best winter cakes to share with people you love. So, if you’re looking for dessert ideas chocolate lovers will talk about for weeks, you’ve found it. Let’s walk through it together.
Ingredients
For the Chocolate Cake Layers:
- 2¼ cups all-purpose flour, sifted
- 2½ cups granulated sugar
- ¾ cup dark cocoa powder (Dutch-processed is best)
- 2½ tsp fresh baking powder
- 1 tsp salt
- 1 cup + 2 tbsp unsalted butter, at room temperature
- 1 cup egg whites (from about 7 large eggs), at room temperature
- 1½ cups buttermilk, at room temperature
- 2 tbsp vegetable oil
- 2 tsp pure vanilla extract
- 1 tsp instant espresso powder (optional, but recommended!)
For the White Chocolate Mousse:
- ¾ cup high-quality white chocolate chips
- ⅓ cup warm water
- 1⅓ cups cold heavy cream
- 2 tbsp powdered sugar
- ½ tsp vanilla extract
- ¼ tsp salt
For the Dark Chocolate Mousse:
- ½ cup quality dark chocolate chips
- ⅓ cup warm water
- 1 cup cold heavy cream
- 2 tbsp powdered sugar
- ¼ tsp salt
For the Chocolate Ganache:
- 1 cup + 1 tbsp high-quality dark chocolate chips
- ¾ cup heavy cream
- 2 tbsp unsalted butter, at room temperature
- 1 tbsp corn syrup
- Pinch of salt
Step-by-Step Instructions
Prepare the Chocolate Cake Layers
- First things first, let’s get the oven ready. Preheat it to 350°F (175°C). Take three 9-inch round cake pans, grease them well with butter, and line the bottoms with parchment paper circles. This little step is a lifesaver for getting the cakes out cleanly.
- In a large bowl, whisk together your sifted flour, sugar, cocoa powder, baking powder, and salt. Mixing the dry ingredients first ensures everything is evenly distributed.
- Now, for the wet ingredients. In a separate bowl, combine the room temperature buttermilk, oil, vanilla, and the optional (but highly recommended!) espresso powder.
- In the bowl of a stand mixer fitted with the paddle attachment, beat the room temperature butter on medium speed until it’s creamy and smooth.
- Slowly add the dry ingredients to the butter, mixing on low speed until it looks like damp sand. Then, gradually pour in the egg whites, mixing until just combined.
- Finally, add the buttermilk mixture in a slow stream, mixing on low until the batter is smooth. Be careful not to overmix here; stop as soon as the streaks of flour disappear.
- Use a kitchen scale to divide the batter evenly among your three prepared pans. This ensures your layers are all the same height.
- Bake for 30-35 minutes. A good way to check for doneness is to insert a toothpick into the center—it should come out with a few moist crumbs attached, not wet batter. Let the cakes cool in their pans for about 10 minutes before turning them out onto wire racks to cool completely.
Make the Mousses
- For the white chocolate mousse, place the white chocolate chips in a heatproof bowl with the warm water. Melt them gently, either over a double boiler or in the microwave in 20-second bursts, stirring until smooth. Let this mixture cool completely to room temperature.
- While that cools, pop a mixing bowl and the beaters in the freezer for about 20 minutes. This trick helps the cream whip up beautifully.
- In the chilled bowl, beat the cold heavy cream, powdered sugar, vanilla, and salt on high speed until stiff peaks form.
- Gently fold the cooled white chocolate mixture into the whipped cream with a spatula until no streaks remain. Cover and pop it in the fridge for at least 2 hours to set.
- Repeat the exact same process for the dark chocolate mousse: melt the dark chocolate with warm water, let it cool, whip the cream with sugar and salt in a chilled bowl, and fold the two together. Refrigerate this mousse for at least 2 hours as well.
Assemble Your Gourmet Chocolate Cake
- If your cake layers have a dome on top, use a long serrated knife to carefully level them. Place your first cake layer on your serving plate or cake stand.
- Spread all of the white chocolate mousse evenly over the first layer, right to the edges.
- Gently place the second cake layer on top. Cover this layer with all of the dark chocolate mousse.
- Add the third and final cake layer. Gently press down to make sure it’s stable. Place the assembled cake in the refrigerator for 30 minutes to firm everything up before the ganache.
- To make the ganache, place the dark chocolate chips in a bowl. Heat the heavy cream until it just starts to simmer, then pour it over the chocolate. Let it sit for 2 minutes without stirring.
- Add the butter, corn syrup, and salt, then stir slowly from the center outwards until you have a smooth, glossy ganache. Let it cool for 15-20 minutes. You want it pourable, but thick enough to create those lovely drips.
- Pour the ganache over the center of the chilled cake, using an offset spatula to gently nudge it towards the edges, letting it drip down the sides naturally.
- Decorate with chocolate shavings or whatever you fancy. Refrigerate the finished cake for at least 2 hours before serving to let everything set perfectly. This is one of the most important steps in this Gourmet Chocolate Cake Recipe!
Tips & Tricks for this Gourmet Chocolate Cake Recipe
Creating a cake with this many components can feel intimidating, but a few little secrets can make the process smooth and enjoyable. First, let’s talk about ingredients. Using room temperature ingredients (butter, eggs, buttermilk) for the cake batter is non-negotiable. It allows them to emulsify properly, creating a tender, even crumb. If you forget to take them out, you can place eggs in a bowl of warm water for 10 minutes and microwave buttermilk in 10-second intervals. For the mousses, the opposite is true: your heavy cream, bowl, and beaters should be as cold as possible. This is the key to getting a stable, fluffy whipped cream that holds its shape. These small details are what elevate a good cake into a Gourmet Chocolate Cake Recipe.
The Key to Perfect Mousse and Ganache
The mousses are the heart of this cake, so let’s get them right. When melting your chocolate with water, be patient. If it seizes up, it’s likely due to overheating. A gentle double boiler is foolproof. The most crucial step is folding the melted chocolate into the whipped cream. The chocolate must be cooled to room temperature; if it’s even slightly warm, it will melt the whipped cream and turn your mousse soupy. Fold gently with a spatula, scraping the bottom of the bowl and turning the mixture over on itself until just combined. For the ganache, the corn syrup isn’t just for sweetness; it’s what gives it that beautiful, professional-looking gloss. And don’t skip the cooling time. A warm ganache will run right off the cake, but one that has cooled for 15-20 minutes will create those perfect, thick drips that make this one of those truly beautiful dessert recipes.
Why is it important to level the cake layers?
Leveling your cake layers is a small step that makes a huge difference in the final presentation and stability of your cake. Most cakes dome slightly in the middle as they bake. If you try to stack domed layers, the cake will be wobbly and uneven. The mousse fillings can squish out the sides, and the top layer won’t sit flat, making it difficult to apply the ganache. By slicing off that small dome with a serrated knife, you create flat, stable surfaces. This ensures your finished cake is straight, tall, and looks professionally made. It’s a foundational step for any layered cake, especially one as elegant as this.
Substitutions & Variations
While this recipe is a classic, it’s also a wonderful canvas for your own creativity. One of the most common questions I get is about making recipes gluten-free. For this cake, you can substitute the all-purpose flour with a high-quality, cup-for-cup gluten-free baking blend that contains xanthan gum. The texture might be slightly denser, but it will still be a delicious chocolate cake. For a dairy-free version, things get a bit trickier with the mousses, but it’s possible. You can use a full-fat coconut cream (the thick part from a chilled can) in place of heavy cream for the ganache and mousses, though the texture will be softer. Use a good plant-based butter and a dairy-free buttermilk alternative (like almond milk with a teaspoon of vinegar) in the cake batter. These swaps can turn this into one of those delicious cake ideas for everyone.
Fun Flavor Variations
If you want to play with the flavors, there are so many fun options! Consider adding a teaspoon of peppermint extract to the dark chocolate mousse for a festive holiday twist, making it one of the best winter cakes. For a more adult palate, a tablespoon of raspberry liqueur (like Chambord) folded into the dark chocolate mousse adds a beautiful, fruity depth. You could also add a thin layer of seedless raspberry jam on top of the first cake layer before spreading on the white chocolate mousse. For another idea, swap the vanilla in the white chocolate mousse for almond or coconut extract. These little changes are fun chocolate cake ideas that can make the recipe your own signature dessert.
Can I use milk chocolate instead of dark?
You absolutely can, but it will change the flavor profile of the cake. This recipe is designed around the balance of rich, semi-sweet dark chocolate and very sweet white chocolate. Using milk chocolate for the dark chocolate mousse or ganache will result in a much sweeter overall dessert. If you have a big sweet tooth, you might love it! I would recommend using a high-quality milk chocolate with a higher cacao percentage (around 35-40%) to ensure it still has a nice chocolatey flavor. You may also want to slightly reduce the powdered sugar in the mousse if you make this substitution.
Frequently Asked Questions
Can I make this cake ahead of time?
Yes, this is a great cake to make in stages. You can bake the cake layers up to two days in advance. Once they are completely cool, wrap them tightly in plastic wrap and store them at room temperature. The mousses can also be made a day ahead and kept covered in the fridge. You can even assemble the entire cake (minus the ganache) the day before you plan to serve it. Just keep it well-covered in the refrigerator. I actually prefer to pour the ganache on the day of serving for the best shine and texture.
What filling goes best with chocolate cake?
This is a fantastic question! While classic buttercream is always an option, a light and airy mousse filling, like the ones in this recipe, provides a beautiful textural contrast to a rich chocolate cake. The mousse doesn’t make the cake overly heavy or sweet. Other wonderful fillings include raspberry coulis for a tart kick, salted caramel for a sweet and savory note, or a simple whipped cream and fresh berry filling for a lighter touch. But for a true tuxedo cake, the white and dark chocolate mousse combination is iconic.
My ganache is too thick/thin. How can I fix it?
Don’t worry, ganache is very forgiving! If your ganache seems too thick to pour after cooling, gently warm it over a double boiler or in the microwave for 5-10 seconds and stir in a teaspoon of warm heavy cream at a time until it reaches the right consistency. If it’s too thin and runny, it likely needs to cool longer. If it’s still too thin after cooling, you can stir in a few more melted chocolate chips to thicken it up. Let it sit for another 10 minutes to reach the perfect pouring consistency.
Conclusion
Baking this Chocolate Tuxedo Cake is more than just following a recipe; it’s about creating an experience. It’s a journey of textures and temperatures, from the warmth of the oven to the chill of the mousse. Seeing those distinct, beautiful layers come together is incredibly satisfying. This Gourmet Chocolate Cake Recipe is proof that you can create a bakery-quality masterpiece in your own kitchen. It’s the perfect answer when you’re searching for chocolate bday cake ideas that feel grown-up and special, or simply want to indulge in one of life’s most delicious pleasures. I hope you love every moment of making—and eating—this cake as much as I do. Happy baking!
Gourmet Chocolate Tuxedo Cake
Ingredients
Equipment
Method
- Preheat the oven to 350°F (175°C). Grease three 9-inch round cake pans with butter and line the bottoms with parchment paper circles.
- In a large bowl, whisk together the sifted flour, sugar, cocoa powder, baking powder, and salt.
- In a separate bowl, combine the room temperature buttermilk, oil, vanilla, and optional espresso powder.
- In the bowl of a stand mixer fitted with the paddle attachment, beat the room temperature butter on medium speed until creamy and smooth.
- Slowly add the dry ingredients to the butter, mixing on low speed until it looks like damp sand. Then, gradually pour in the egg whites, mixing until just combined.
- Add the buttermilk mixture in a slow stream, mixing on low until the batter is smooth. Do not overmix.
- Use a kitchen scale to divide the batter evenly among the three prepared pans.
- Bake for 30-35 minutes, or until a toothpick inserted into the center comes out with a few moist crumbs. Let the cakes cool in the pans for 10 minutes before turning them out onto wire racks to cool completely.
- For the white chocolate mousse, place the white chocolate chips and warm water in a heatproof bowl. Melt gently over a double boiler or in the microwave in 20-second bursts, stirring until smooth. Let cool completely to room temperature.
- Chill a mixing bowl and beaters in the freezer for about 20 minutes.
- In the chilled bowl, beat the cold heavy cream, powdered sugar, vanilla, and salt on high speed until stiff peaks form.
- Gently fold the cooled white chocolate mixture into the whipped cream until no streaks remain. Cover and refrigerate for at least 2 hours to set.
- Repeat the process for the dark chocolate mousse: melt the dark chocolate with warm water, let it cool, whip the cream with sugar and salt in a chilled bowl, and fold the two together. Refrigerate for at least 2 hours.
- If necessary, use a long serrated knife to level the tops of the cake layers. Place the first cake layer on a serving plate.
- Spread all of the white chocolate mousse evenly over the first layer.
- Gently place the second cake layer on top and cover it with all of the dark chocolate mousse.
- Add the third cake layer, pressing down gently. Refrigerate the assembled cake for 30 minutes.
- To make the ganache, place the dark chocolate chips in a bowl. Heat the heavy cream until it just starts to simmer, then pour it over the chocolate. Let it sit for 2 minutes.
- Add the butter, corn syrup, and salt to the chocolate mixture, then stir slowly from the center outwards until smooth and glossy. Let it cool for 15-20 minutes until it’s pourable but thick.
- Pour the ganache over the center of the chilled cake, using an offset spatula to gently nudge it towards the edges and let it drip down the sides.
- Decorate as desired. Refrigerate the finished cake for at least 2 hours before serving to let it set completely.